Configure Agents and Teams
Agents can be customized to perform specific tasks in AI Refinery® Studio. You can configure an agent in two ways: using the Visual Editor or the Code Editor, depending on your comfort level with code and the complexity of the task.
Visual Editor
The Visual Editor provides a configuration panel for each agent, allowing you to adjust settings without writing code. It's ideal for setting up agent behavior quickly and managing parameters for inputs, outputs, and workflow logic.
Within the Visual Editor, you'll find three sections:
Team Settings
Update your agent team (project) name and description. Includes a quick link to the Code Editor to modify your team's base configuration and memory settings.
Org Chart
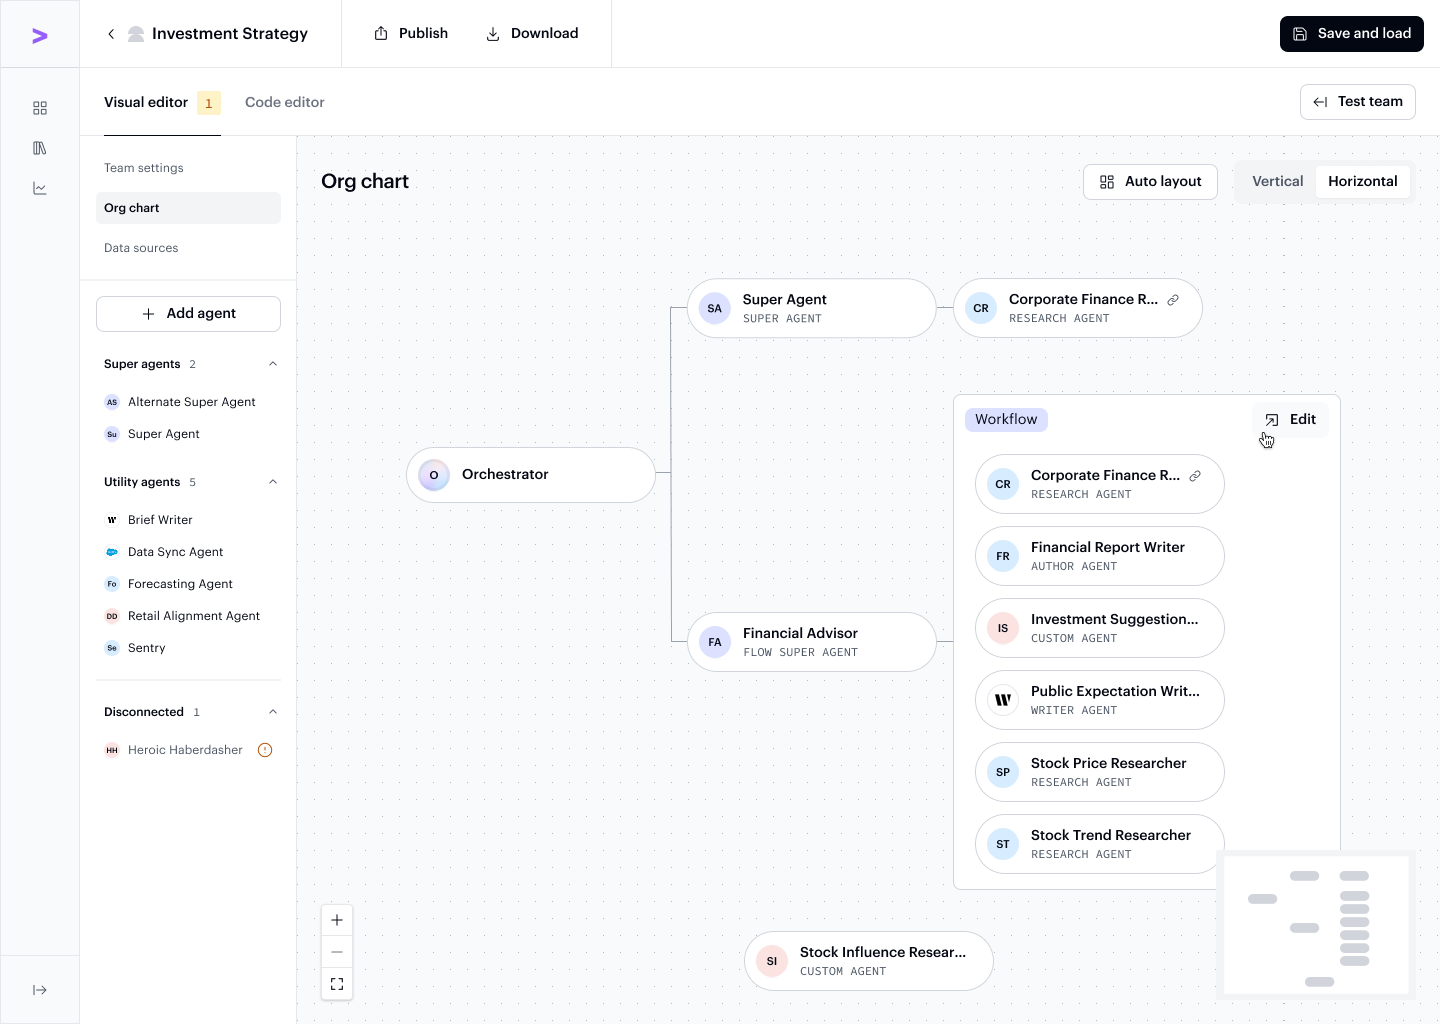
Define and update parent-child relationships between agents, or disconnect agents from your team entirely, using the interactive org chart.
The Org Chart gives you a visual map of how agents are connected. Drag and drop to restructure relationships, or use the Add agent button to introduce new agents into the hierarchy.
Individual Agent Configuration
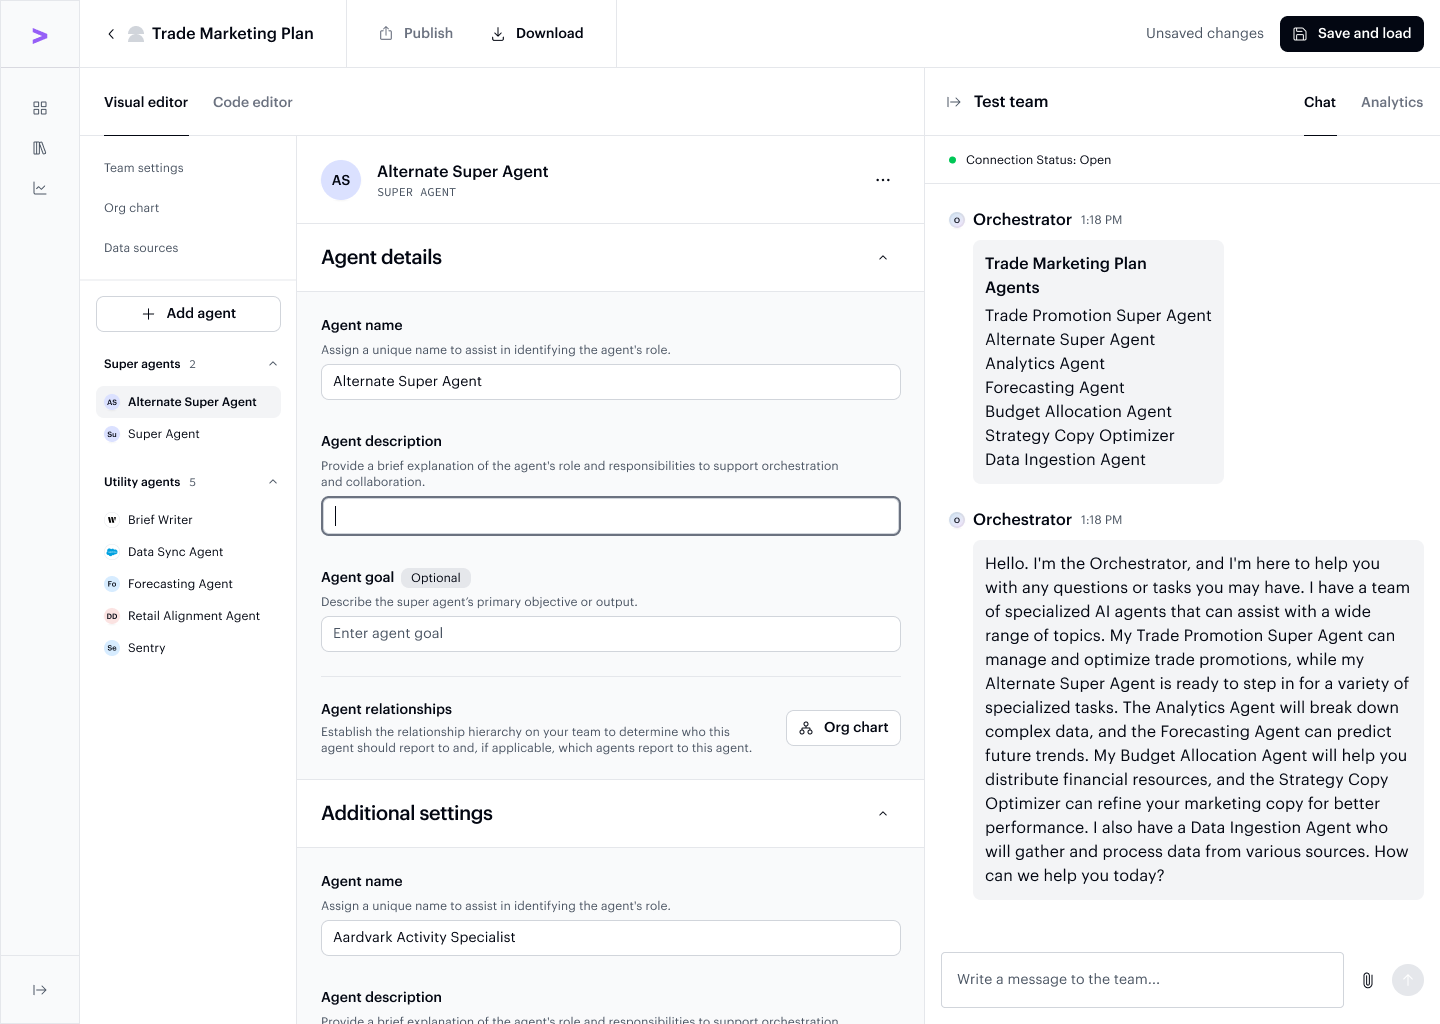
Customize each agent's role, adjust its inputs, and refine its outputs.
Selecting an agent in the team list opens its details panel, where you can set its name, description, parent agent, and any additional settings specific to that agent type.
Code Editor
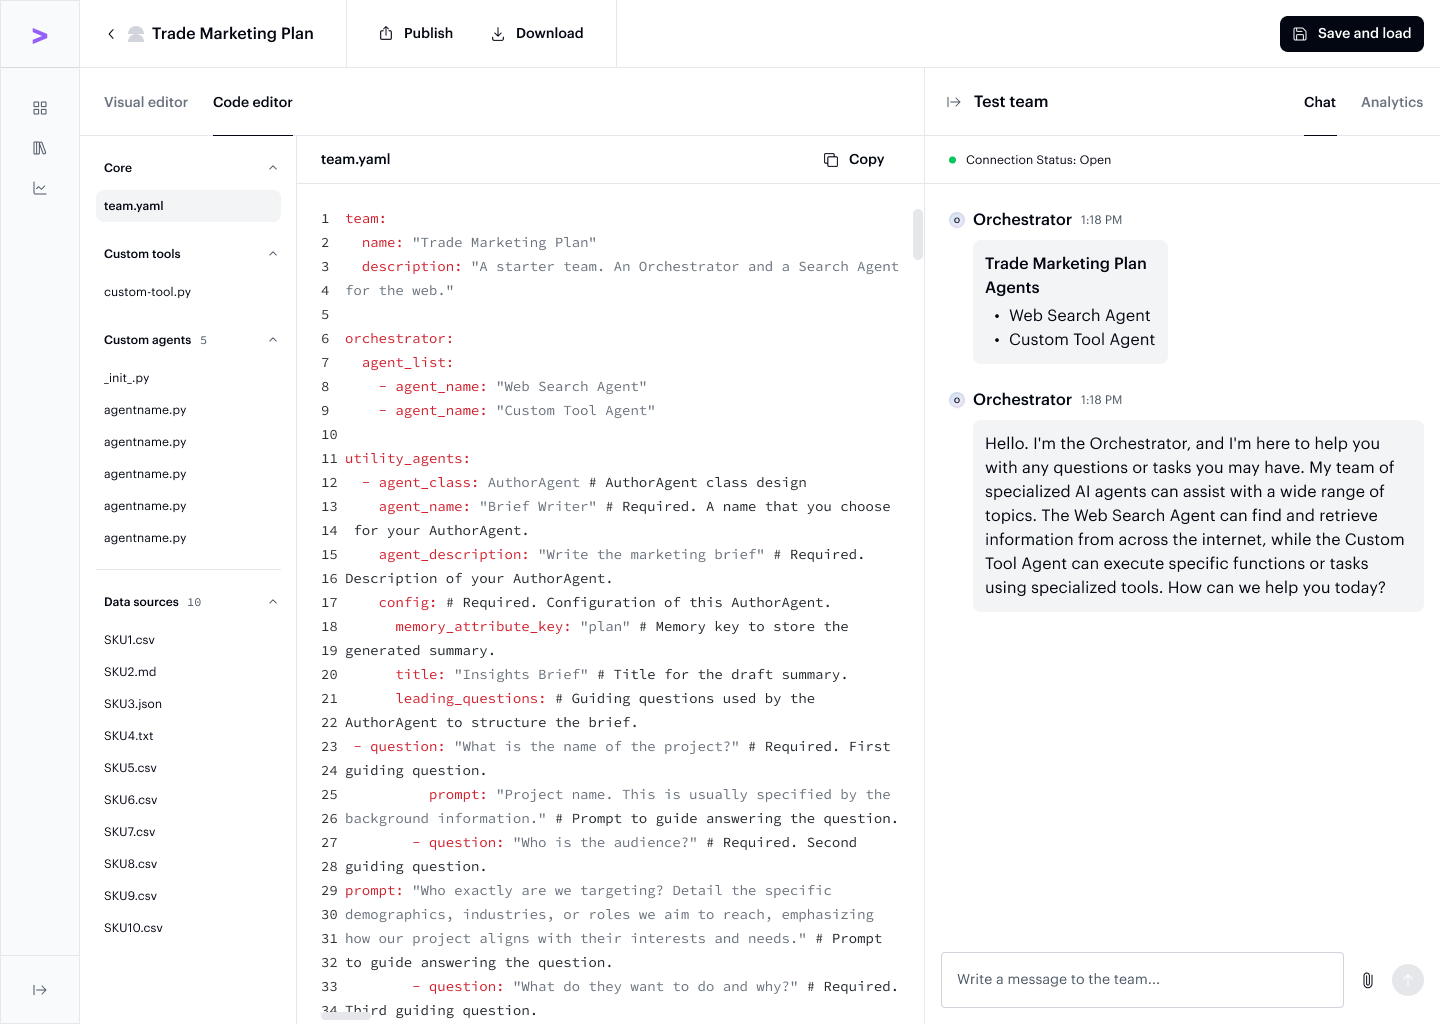
The Code Editor lets you make changes directly to your team's YAML and Python files using an embedded ACE editor. This allows you to update configurations and agent logic without leaving the platform.
The Code Editor displays your full team configuration as editable YAML, with a file tree on the left for navigating between agents and settings files.
Use the Code Editor when you need to:
- Directly modify team configuration files
- Edit agent logic beyond what the Visual Editor exposes
- Work with memory settings and advanced parameters
For the full YAML configuration schema and available options, see the Project Guidelines. For guidance on writing custom agent Python logic, see Custom Agent in the SDK docs.
Saving your changes
After making changes in the Visual Editor or Code Editor, click outside the editor panel to register your edits. Once changes are detected, the Save and load button in the toolbar will become active — click it to save and load your updated configuration.
Next step
Once you've configured your team, use the Test panel to validate your changes before deploying.